Design tooltips with the editor
Steps can be designed in many ways: Text can be entered and formatted. Links, images, and videos can be integrated to use additional, possibly already existing content and put it into the context of the process, or just to make the routes as appealing as possible. In addition, iframes can be integrated that, for example, display knowledge items from a central knowledge database or integrate survey solutions or chat bot solutions already used in the company.
The possibilities in the editor
The editor provides you with numerous options:
Edit and format text
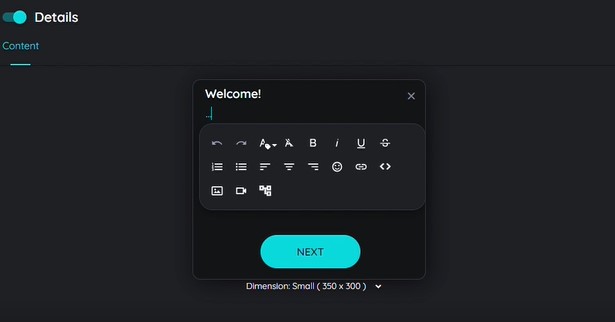
After you have selected a step in the route planner, it appears in the detail area on the right side. Here, you can enter the text according to your ideas. As soon as you click on the tooltip, the available options appear in the editor.
- Undo / Redo
Reverse the steps if you did them by mistake or if you are not satisfied with the result, or repeat them again. - Inline Class
An "Inline Class" refers to a custom CSS class that can be applied to a selected element within the editor's content, which helps to customize text. - Clear formatting
Remove all formatting that was applied to copied and pasted text from the original source. - Text formatting
Select the text and then choose from the Bold, Italic, Underline, and Strikethrough options. - Paragraph formatting
Select the desired paragraph and choose from the options: ordered list, unordered list, left-aligned, centered, or right-aligned. - Insert icons
Choose icons from an extensive icon library.
Format Text Editor
Embed and format text
The most commonly used content type is text, which describes the action to be performed on the given element.
- Open the desired route in Edit mode
- Select the desired step in the "Steps" section
- Click headline or text in the tooltip that appears in the right "Details" section
- Enter text, select it, and format it as desired (bold, italic, lists,...)
If the space in the tooltip is not enough, you can simply enlarge or reduce the tooltip at the left and right changes and in the corners by holding down the left mouse button.
Embed links
Very often, content already exists that can be used. Sometimes these lead to a shadowy existence in knowledge databases and can be made available to the user, without a search, directly in a tooltip suitable for this purpose.
- Open the desired route in Edit mode
- Select the desired step in the "Steps" section
- Click on the text in the tooltip and select the option "Insert Link"
- Enter the text to be displayed and the respective URL
If a description and the URL were entered, the link will appear in the tooltip for the user.
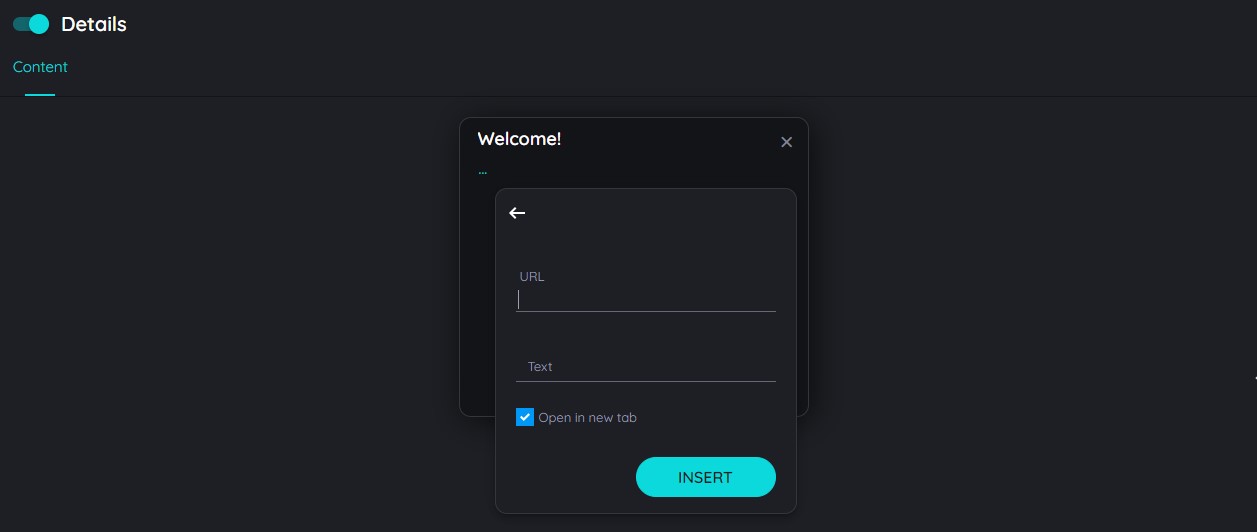
Add a link to your tooltip
Embed an iframe
The integration of iframes in tooltips represents a particularly powerful functionality. Among other things, they allow the integration of content from knowledge databases, the use of surveys, or even the integration of chat bot solutions. AppNavi thus offers the possibility to integrate mostly already established software solutions with low effort instead of additive solutions.
- Open the desired route in Edit mode
- Select the desired step in the "Steps" section
- Click on the text in the tooltip and select the option "iframe"
- Enter a URL, and the iframe will be shown as a preview
- Select the iframe size in % or pixels (px)
- Confirm with "OK" or select "Cancel" to discard the changes
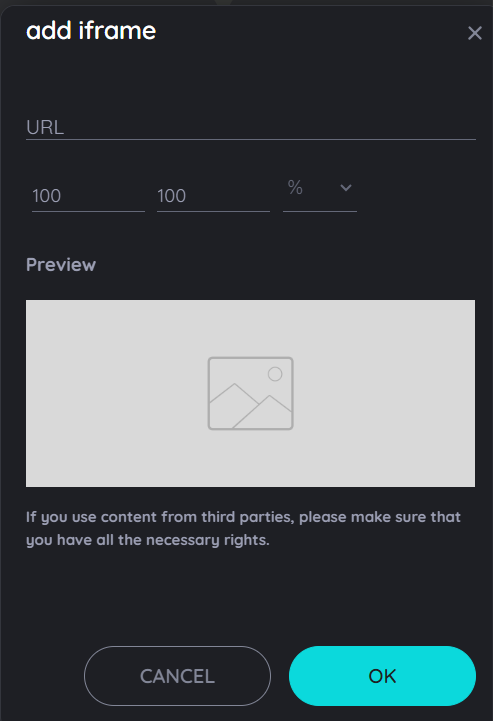
Adding Iframe
Embed an image
Images can be embedded to support a message or simply to make the content as engaging as possible. This has a significant impact on end-user acceptance.
-
Open the desired route in Edit mode
-
Select the desired step in the "Steps" section
-
Click on the text in the tooltip and select the option "Image"
Via Remote
-
Select the tab "Remote" (default)
-
Enter a URL, and the image will be shown as a preview
-
Select the image size in % or pixels (px)
-
Confirm with "OK" or select "Cancel" to discard the changes
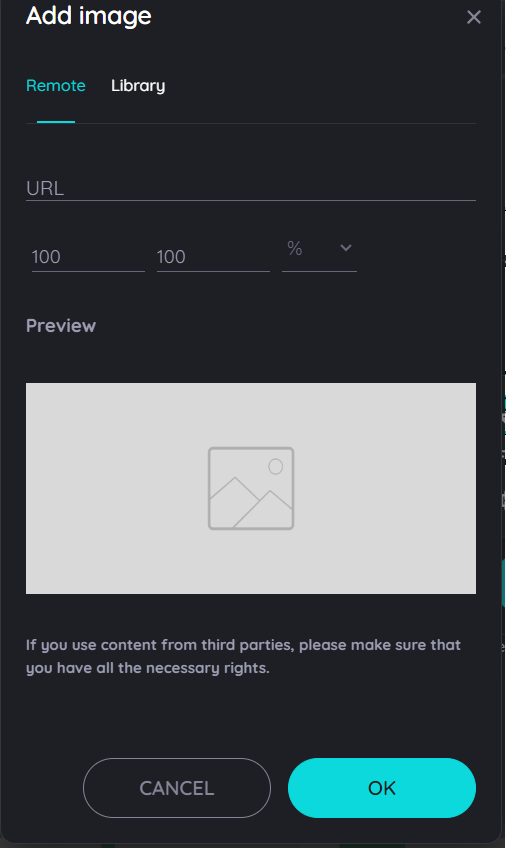
Dialog to add an image to a tooltip with Remote Option
Via Library
- Select the tab "Library"
- Select an image
- Confirm with "OK" or select "Cancel" to discard the changes
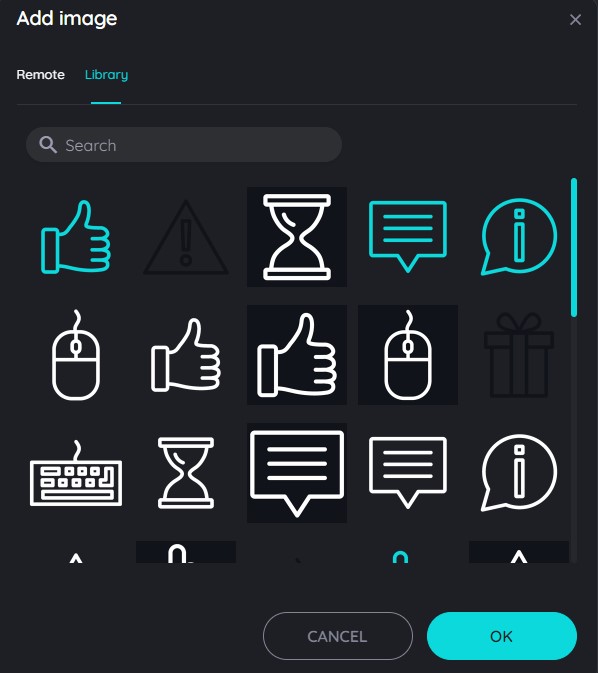
Dialog to add an image to a tooltip with Media Option
Note: image formats
Images in .jpg and .png formats are uploaded to the media library when you insert them, are virus-checked, and are available for your content until you delete them from the media library. Other file formats may be used but will not be uploaded to the media library. If the provider of an external link no longer makes the object available (under the path entered), the graphic will no longer be displayed in your content.
Note: copyrights
Please note that AppNavi does not check for any copyright infringements. Therefore, only upload content that can be used by you without any doubt without committing a copyright infringement.
Embed a video
Videos are also an important content type for communicating particularly explanation-intensive issues in a simple way.
- Open the desired route in Edit mode
- Select the desired step in the "Steps" section
- Click on the text in the tooltip and select the option "YouTube"
- Enter a URL, and the video will be shown as a preview
- Select the video size in % or pixels (px)
- Confirm with "OK" or select "Cancel" to discard the changes
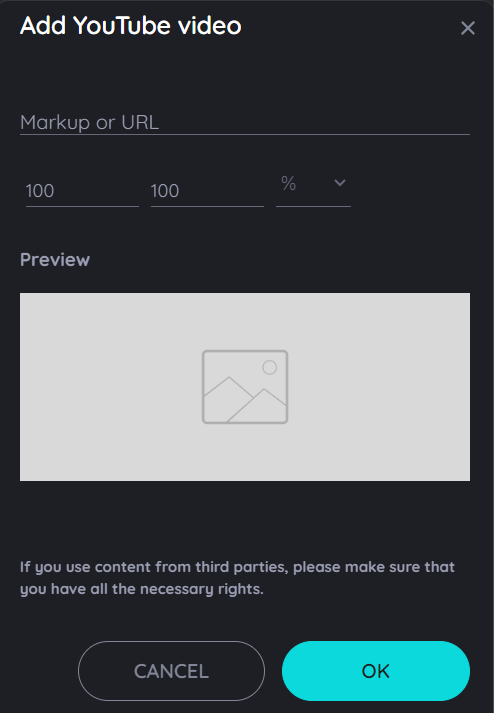
Embed a video in your tooltip
Add connected routes to a step
Connected routes can be used to connect routes to each other. Within each step, the author can integrate possible connections to other existing routes.
End users get the option to select one or more routes they can jump to. By doing so, it is not only possible to connect routes from within the same application; users can also jump to routes within other systems. This allows for a set of subroutines that can be combined in an intelligent way.
- Open the respective route in edit mode by hovering over the route tile and clicking on the "Edit" icon
- Select any of the steps
- Click in the tooltip text area of this step in the "Details" tab
- Now click on the option "Connected routes"
- In the dialog that opens, the available routes are now displayed (grouped into the available apps).
- Select one or more routes. You can recognize the selected routes by the colored "Check" icons.
- Click on "OK" if all appropriate routes are selected, or cancel the process by clicking on the ”CANCEL” or "X" icon.
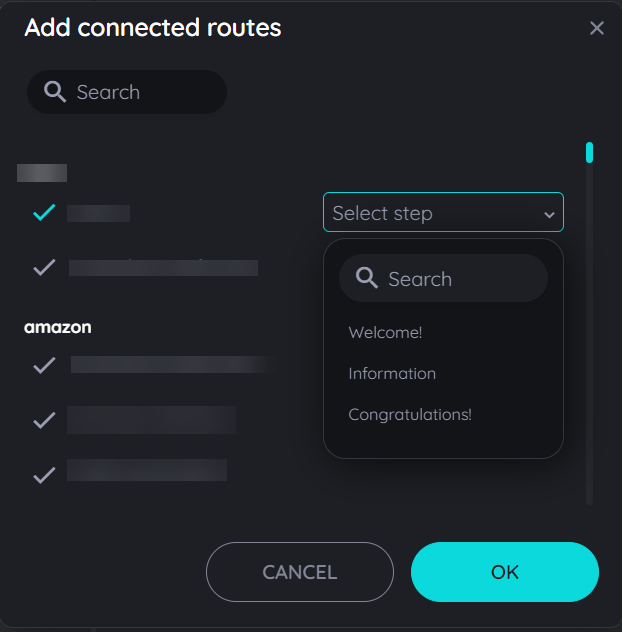
Connected Route Dialog
Updated about 1 month ago