UBM UI Configuration
UBM Applications are objects with predefined JSON that are accessible at application level. And it can have some predefined settings that the user has created at the application level. There is a UI to set JSON for UBM which has made the setting very user friendly.
UBM Application in Portal
When users create a new application in the portal, they have to assign that application to a contract that has UBM activated. Now user can setup UBM configuration through UBM setting using located on the UBM Edit page.
If a user establishes a reference between an application in the portal and JSON while User Behavior Mining is active, it will record data exclusively for non-logged-in users.
Setup UBM For An Application
User can locate UBM and JSON configuration by following the steps mentioned below:
- Go Analytics -> UBM
- Select any Application
- Go to "Setting"
Here user can configure JSON via UI, there are two type of configuration:
- basic configuration
- tracking configuration
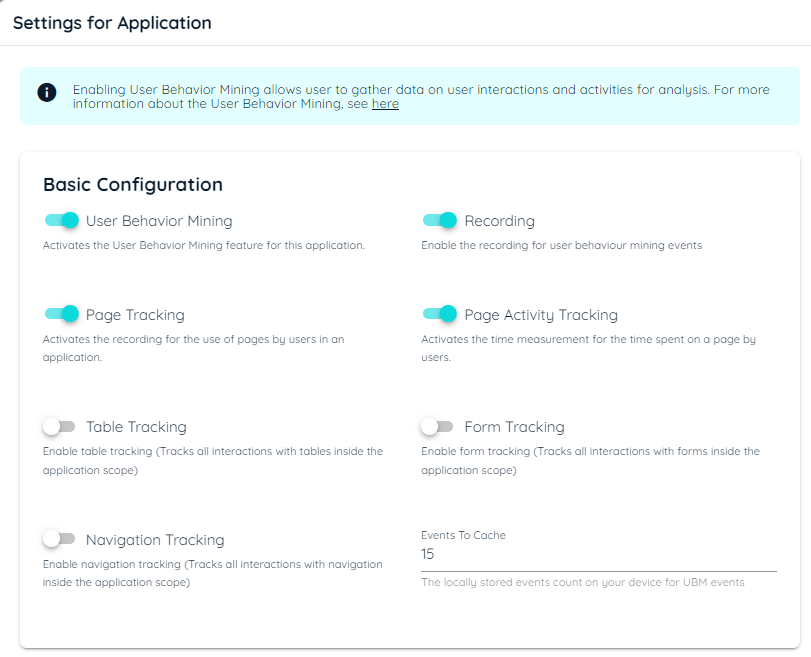
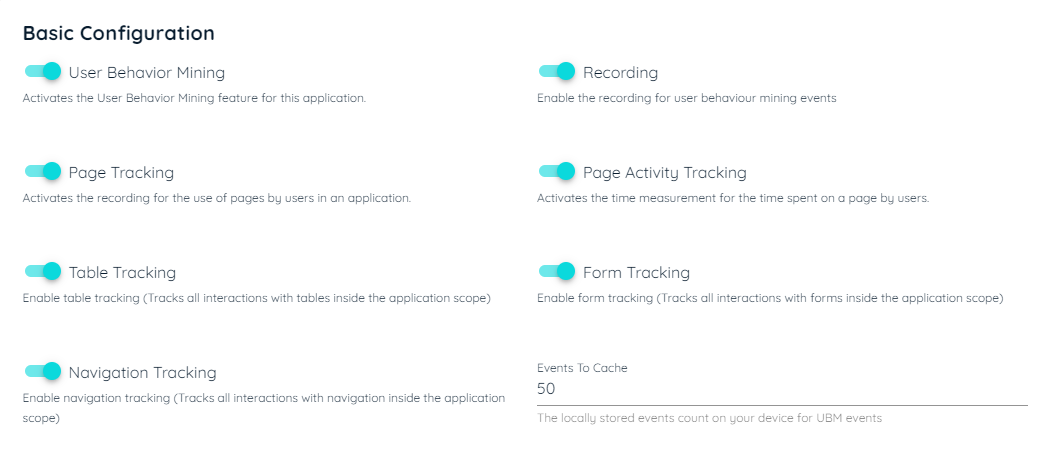
UBM BASIC CONFIGURATION
A UBM basic configuration consists of some generic options that user can enable/disable according to there preferences. These options allow the following automated tracking like: page tracking, tables tracking, forms tracking, and navigation elements.
To enable/disable each option there is a corresponding toggle switch. Following are the options that are available in basic configuration along with there briefings.
- USER BEHAVIOR MINING: If enabled, it will show all areas and trackable element in borders with different colors which user can select. Recording of behavior mining event
- RECORDING: If enabled, it will allow recording of behavior mining event, in all the trackable element in an area.
- PAGE TRACKING: If enabled, it activates the recording for the use of pages by users throughout all the areas that have been setup, which means that pages across the application will be tracked and mining will be done on each page automatically.
- PAGE ACTIVITY TRACKING: If enabled, it activates the time measurement for the time spent on a page by users throughout all the pages in the entire application, which means that the initial and final interaction with each page will be recorded.
- TABLE TRACKING: If enabled, it tracks all interactions with tables inside the application scope, which means that tables across all pages will be tracked and mining will be done on each table automatically.
- FORM TRACKING: If enabled, it tracks all interactions with forms inside the application scope, which ensures that automatic tracking and data extraction from forms across all pages is done.
- NAVIGATION TRACKING: If enabled, it tracks all interactions with navigation inside the application scope. This ensures automatic tracking and extraction of data from navigation across all pages, streamlining the process of tracking and mining data from each navigation.
- Event to Cache: User can set a count for locally stored events on there device for UBM events. The range is between 5 to 50 events that will be hit in one go in local storage.
- Copy/Paste Tracking: If enabled, this will track copy paste on trackable element within an configured area.
NOTE:
If the user disables the recording toggle, then tracking for all enabled options will be stopped as well.
UBM TRACKING CONFIGURATION
- AREA: Area is a specific section in an application where interactions are recorded.
- TRACKABLE ELEMENT: Trackable element includes all elements in a area that is selected for interaction.
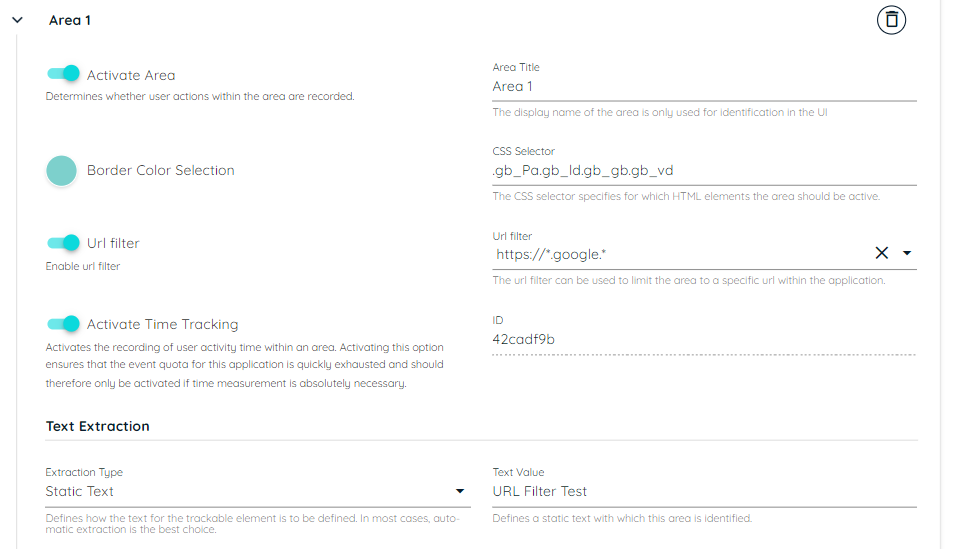
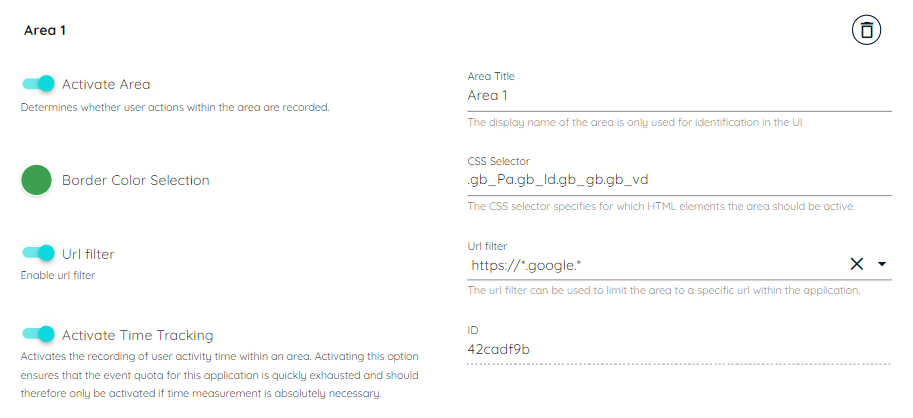
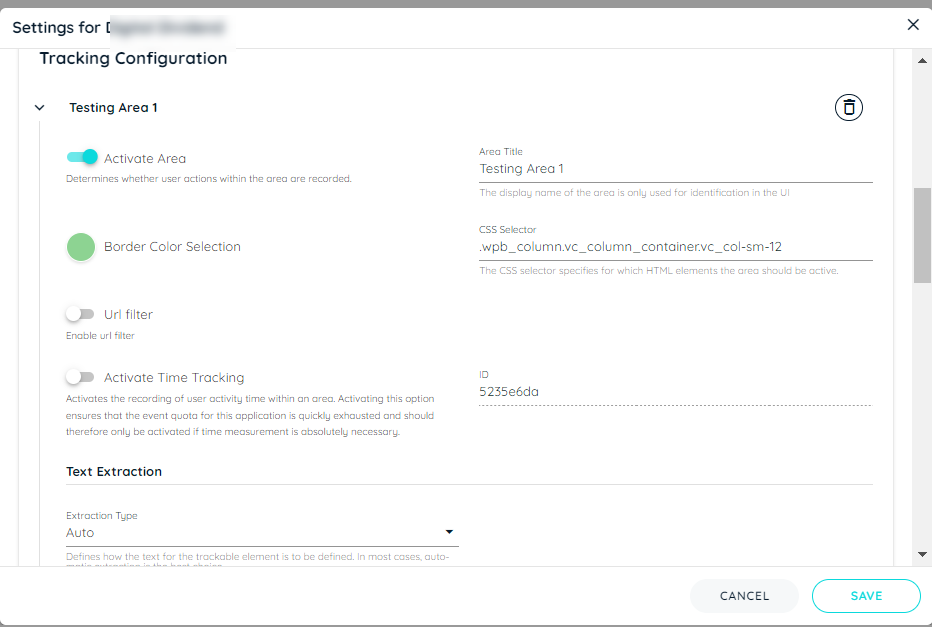
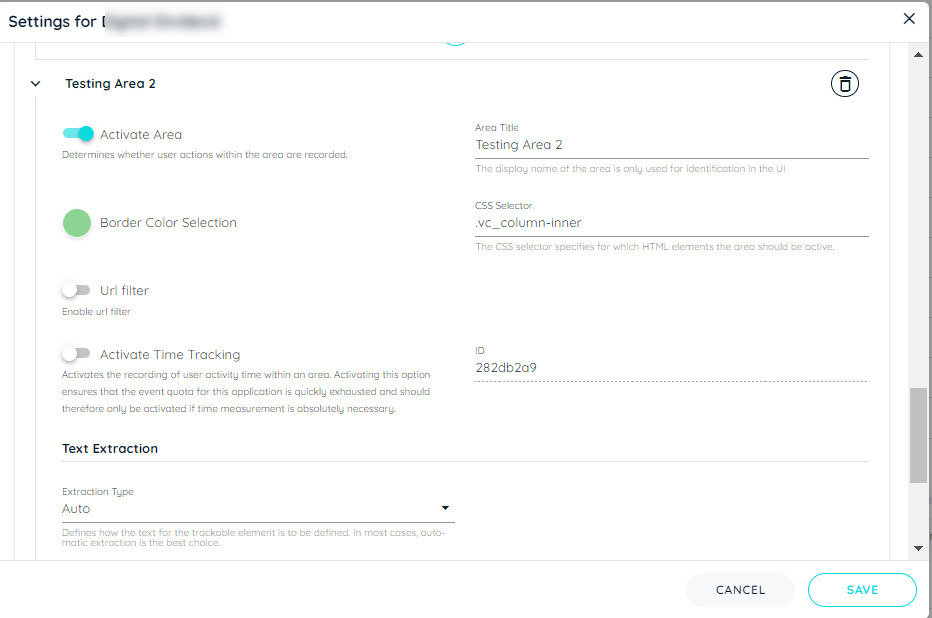
AREA CONFIGURATION
Here user can add multiple area and setup the mentioned configuration for any specific area. If an area is no longer required it can be deleted as well by the delete Icon on the right. User can also add multiple trackable element in a specific area.
- Activate Area: If enabled, it activates mining/recording within this specific area and vise versa.
- Area Title: User input title to distinguish among the areas that are listed in the tracking configuration.
- Border Color Selection: User can select color of the area border.
- CSS Selector:A selector is a unique class that identifies an area for mining.
- URL Filter toggle: This will enable url filter.
- URL Filter:The url filter can be used to limit the area to a specific url within the application.
- Activity Time Tracking: If enabled, it activates the time measurement for the time spent on a specific area by users, which means that the initial and final interaction with a individual area will be recorded.
- ID: Automatically generated ID is an eight-character alphanumeric string that must be unique (read-only).
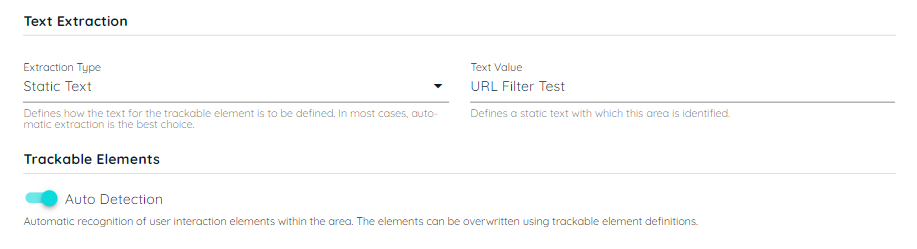
- Text Extraction Type: User select one extraction type among mention four options to extract the title for the area. The four option are: Auto, Selector, Static Text, URL.
- Auto: It will pick text automatically.
- Selector: User will add unique CSS selector.
- Static Text: User will add text itself.
- URL: User will add extraction pattern here.
- Auto Detection:If enabled, user can automatically track all the trackable elements within that area without the need to explicitly specify each individual trackable element.
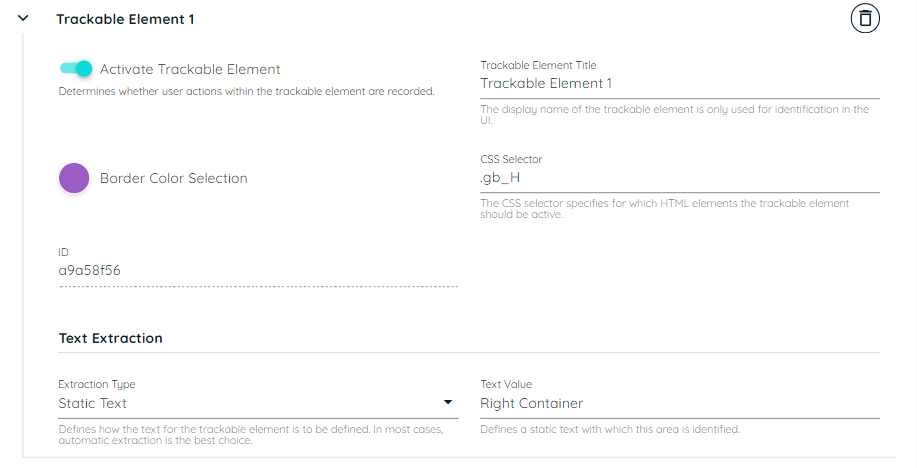
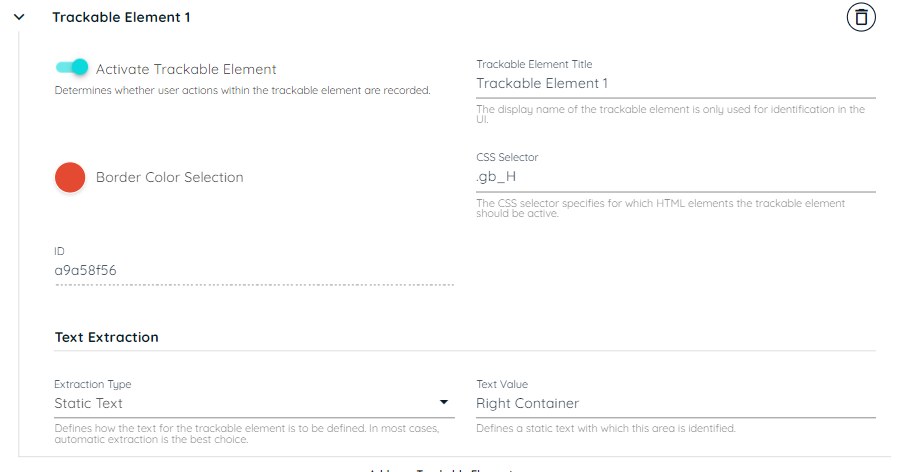
TRACKABLE ELEMENT CONFIGURATION
Here user can add multiple trackable element and setup all the configuration for any specific element. User also can delete trackable element if required.
- Activate Trackable Element:If enabled, it activates mining/recording for this specific trackable element and vise versa.
- Trackable Element Title:User input title to distinguish among the trackable element that are listed under a specific area.
- Border Color Selection: User can select color of the area border.
- CSS Selector: A selector is a unique class that identifies a trackable element in an area for mining.
- ID:Automatically generated ID is an eight-character alphanumeric string that must be unique (read-only).
- Text Extraction Type: User select one extraction type among mention four options to extract the title for the trackable element. The four option are: Auto, Selector, Static Text, URL.
- Auto: It will pick text automatically.
- Selector: User will add unique CSS selector.
- Static Text: User will add text itself.
- URL: User will add extraction pattern here.
Visibility at Avatar Side
Once the UBM configuration is completed, users can view it on the avatar side while logged in.
To access the UBM settings, users need to follow these steps:
- Navigate to the avatar side and log in.
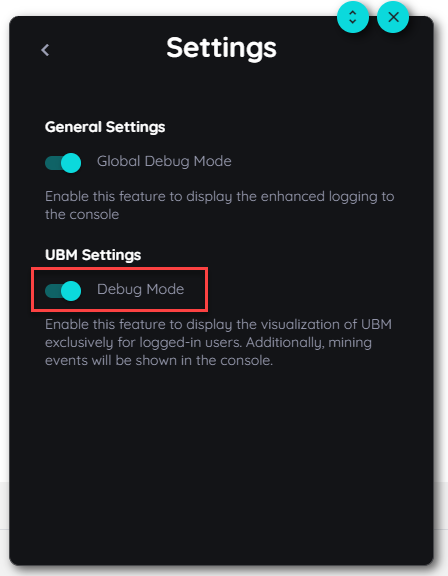
- Click on "Open Settings" icon.
- This action redirects the user to the Settings page.
- From the Settings page, users can locate the UBM settings.
- Within the UBM settings, users can enable the feature "Debug Mode" to display borders on the page for the configured areas.
- Configured areas are highlighted with selected border colors.
- Trackable elements are highlighted with selected border colors.
Enabling this feature not only activates the display of borders but also ensures that mining events are showcased on the console. However, please note that events will only be displayed if the global debug mode is enabled.
When borders are displayed on the page, users are unable to navigate by clicking on elements. To navigate on trackable elements within the application, users must switch off debug mode.
Note:
The UBM settings option and borders will only appear on the avatar side if Use Behavior Mining is enabled in the configuration settings on the portal for the UBM application.
UBM Debug Mode
UBM Borders Visualization
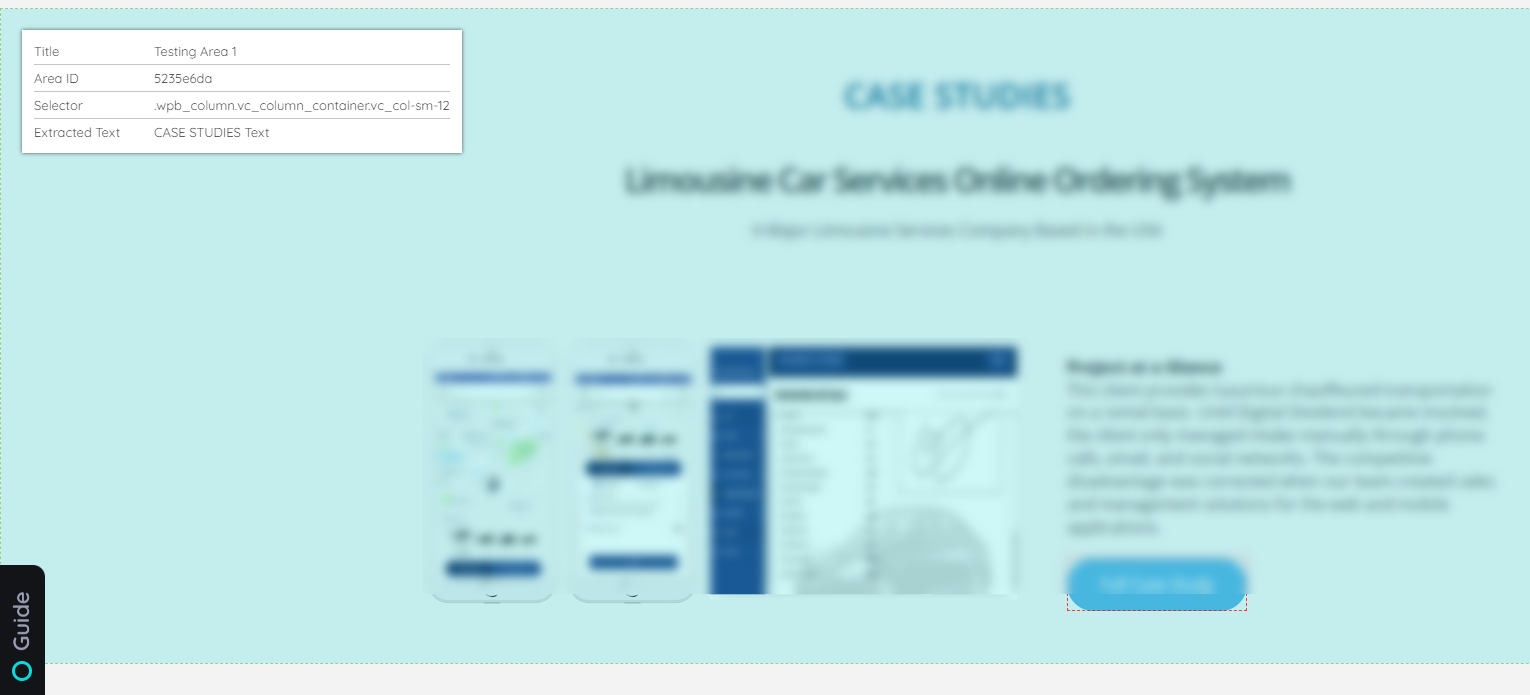
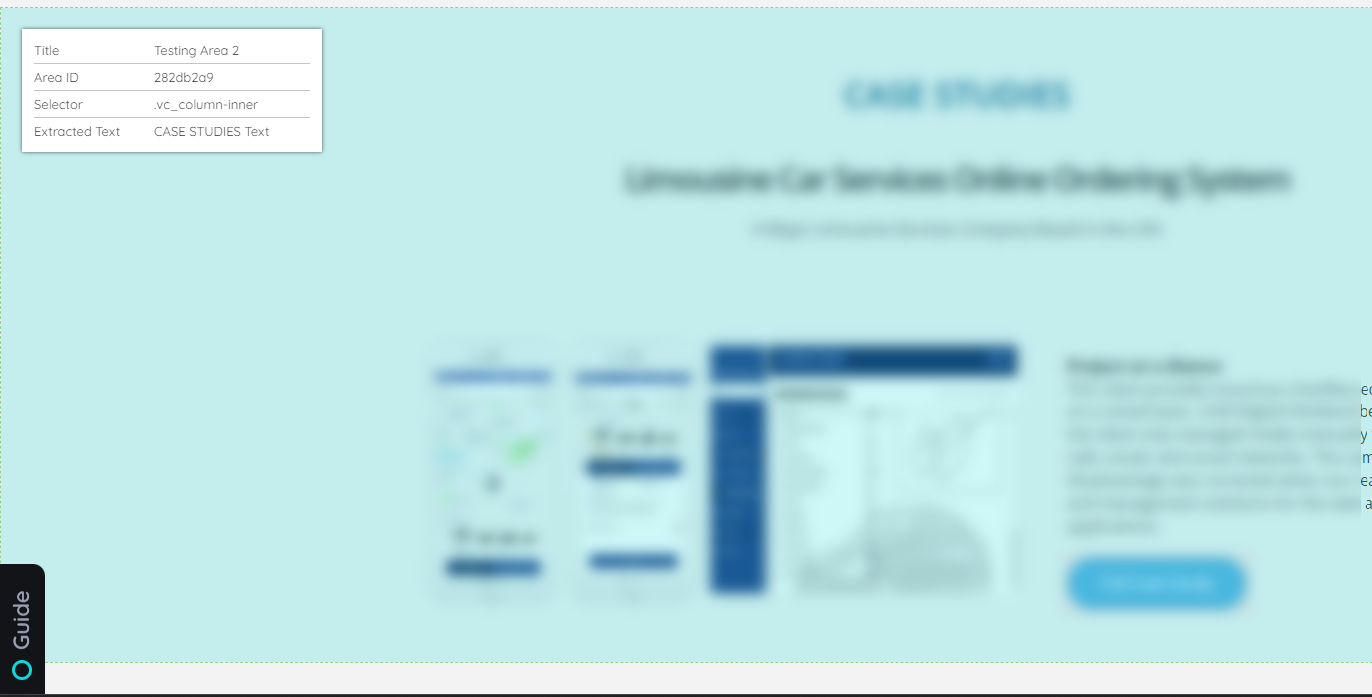
DETAIL VIEW
To view details of a configured area or trackable elements, users need to press Shift + hover on the area or element they want to view details.
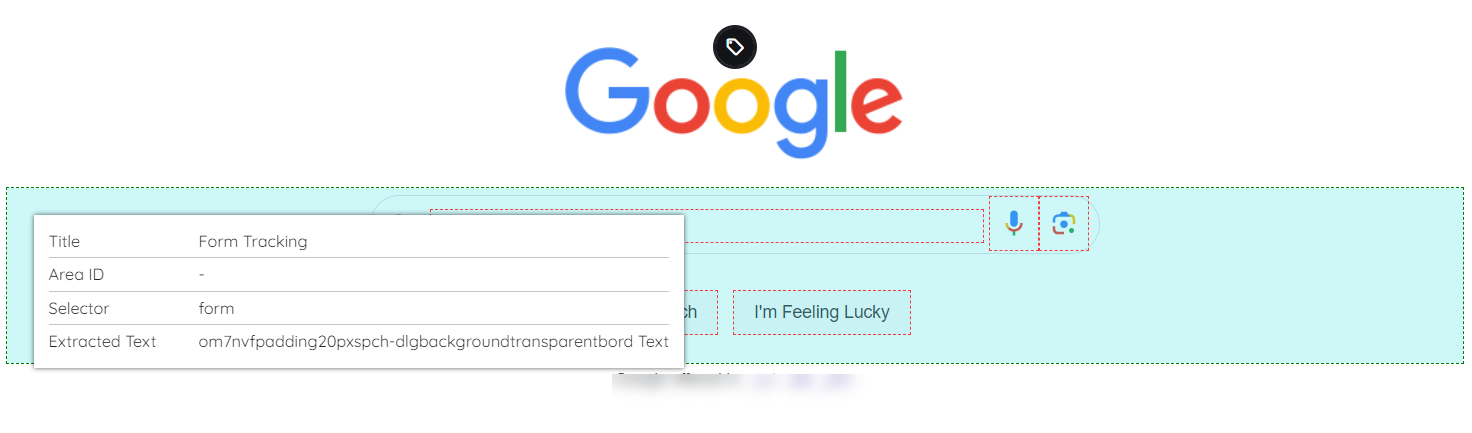
Details of Area
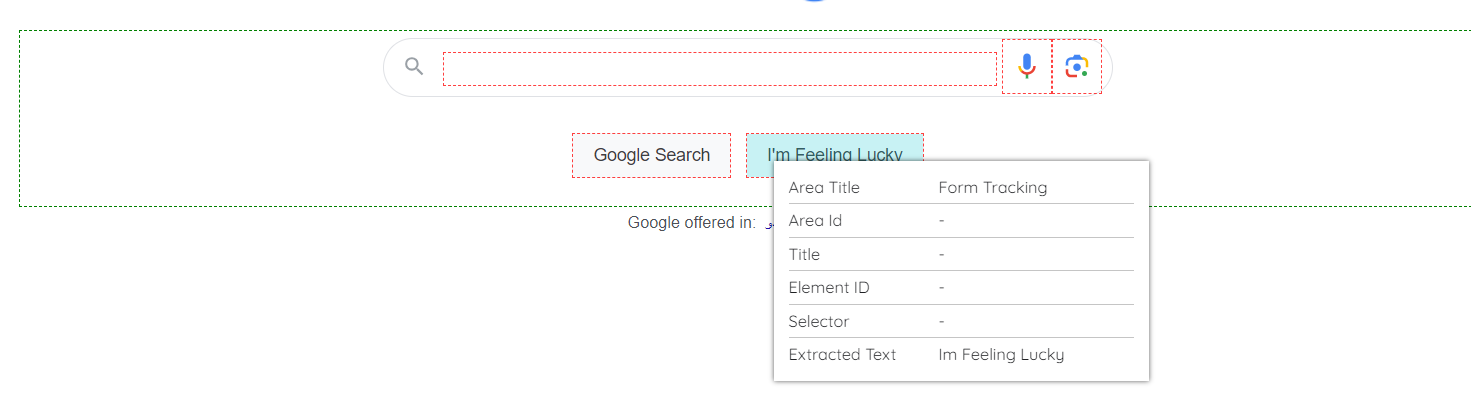
Details of Element
Basic Example
In order to setup UBM, user has to setup basic configuration as mentioned above and following the given steps:
- Enable UBM and recording as that is mandatory.
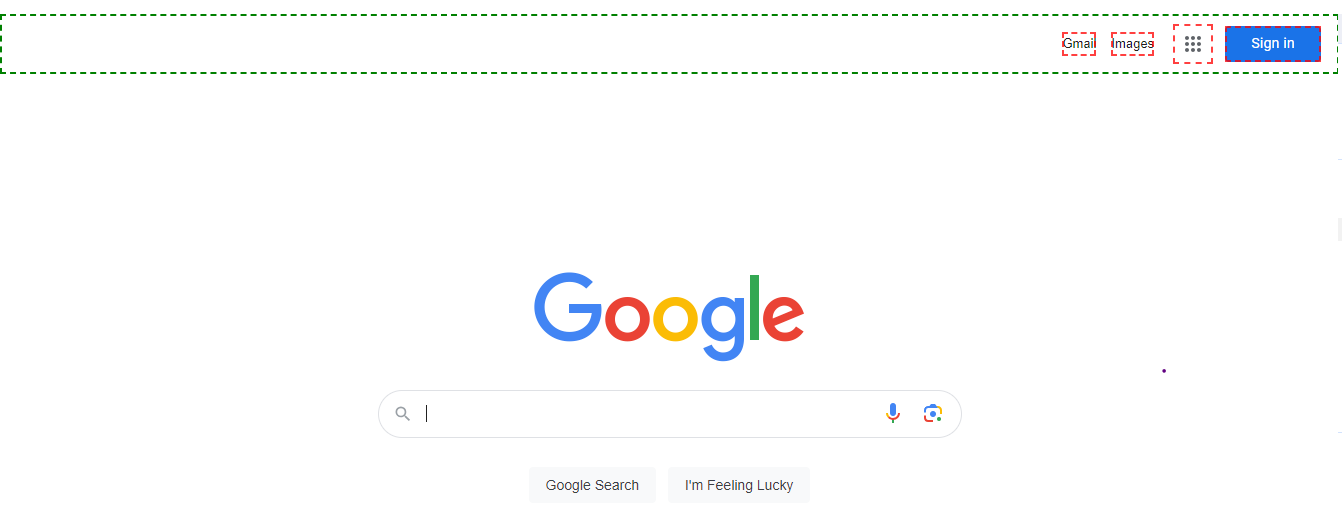
- Setup area for google: CSS Selector=.gb_Pa.gb_ld.gb_gb.gb_vd, which is the top header in the application.
- Setup trackable element for "Gmail": CSS Selector=.gb_H in google.
- There are four trackable elements, user can add other trackable element in the similar way, other details are mentioned as per requirement of the user. Below are some images for UI configuration.
Here is the result at client side, other trackable element are added in the similar way:

EXAMPLE CASES FOR TRACKING
We have outlined several scenarios to provide customers with a clear understanding:
- UI configuration Overrides for Automatic Tracking by disabling its toggle, specific elements can be disabled while the rest remain tracked.
- Table Element Tracking Exception: Individual elements within a table cannot be tracked if they are added as auto-detect trackable elements or by enabling automatic tracking table.
- Individual Element Tracking for Forms and Navigation.
- Tracking in Nested Areas.
- UI Configuration for a DIV that contains a table.
- In this case, a table is defined as an area, and the user defines separate trackable elements.
CASE 1: UI configuration OVERRIDES AUTOMATIC TRACKING
In this scenario, when automatic tracking is enabled for all three types and users specify selectors for individual tables, forms, and navigation elements, the configuration takes precedence. For instance, if the configuration designates a particular table, form, or navigation element as disabled, tracking for that specific table, form, or navigation will cease. Alternatively, if distinct properties are outlined in the configuration with selectors for specific tables, forms, or navigation elements, these specified details will be displayed during tracking.
EXAMPLE:
DISABLE CASE:
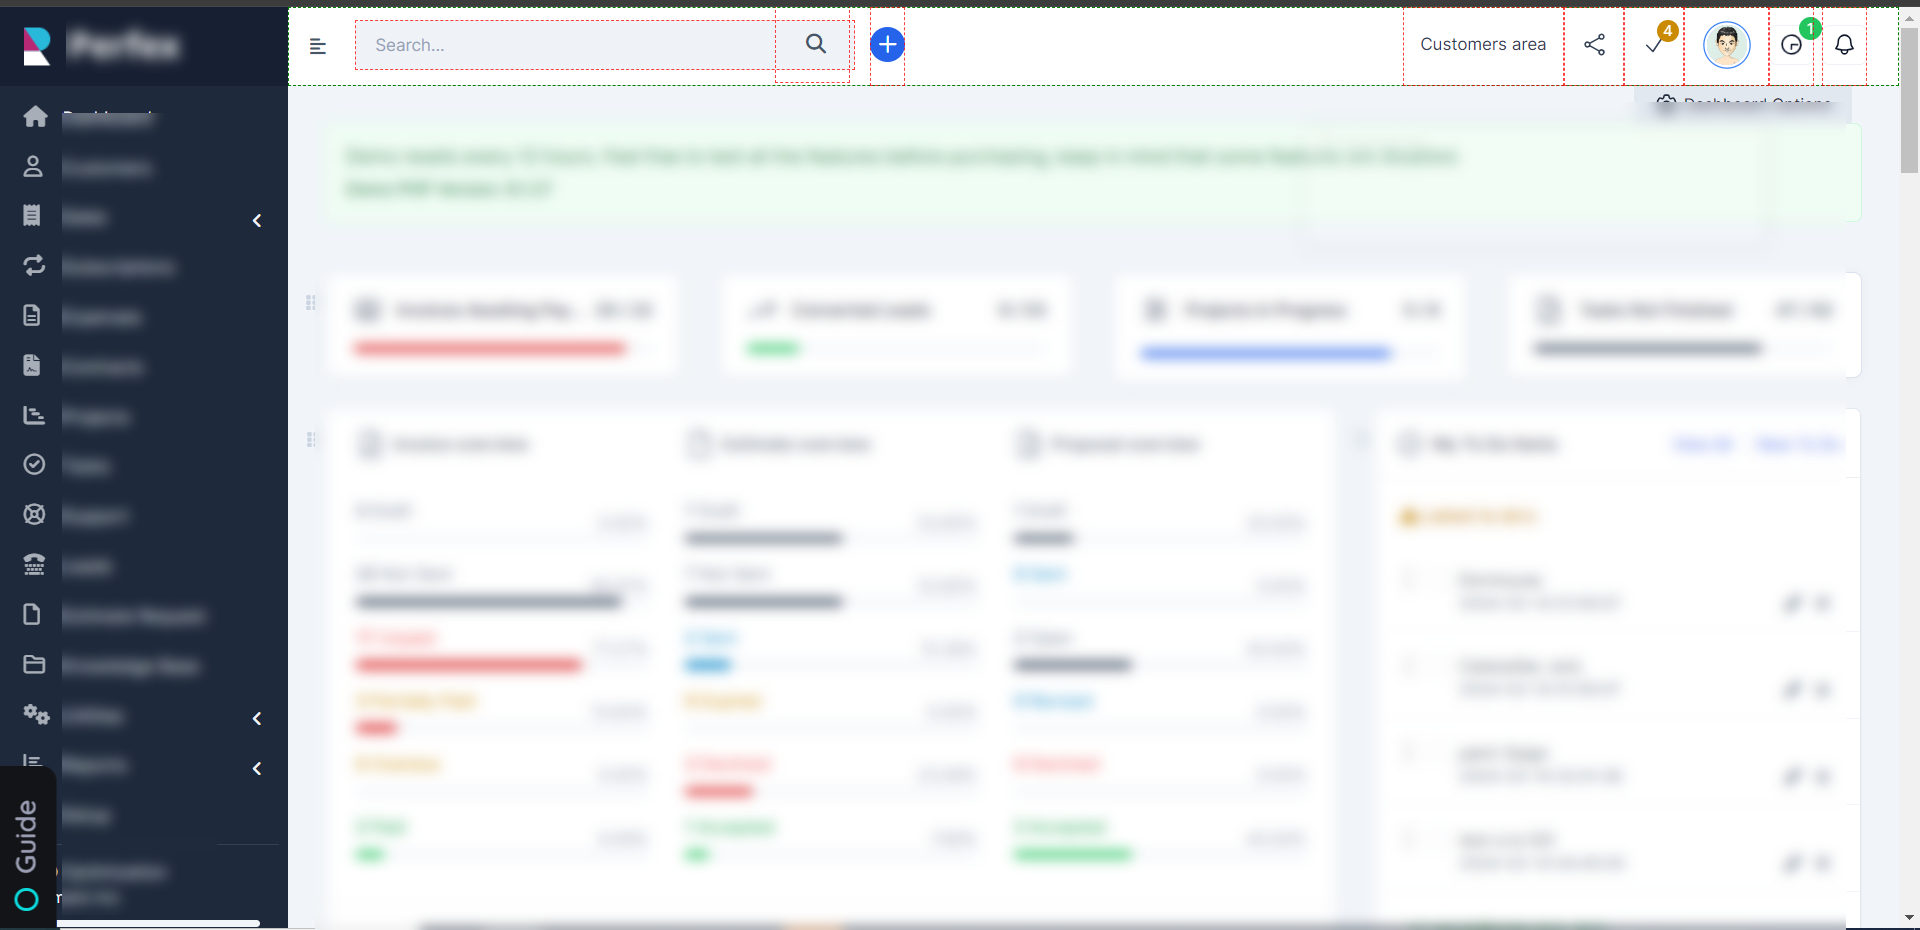
In the configuration, a designated "Side bar" will not undergo tracking, as indicated in the configuration for that specific area. This is due to the property being disable for the said area, effectively excluding it from tracking.
In contrast, tracking functionality remains operational for other areas. A visual comparison highlighting these distinctions is available in the attached images.
ENABLE CASE:
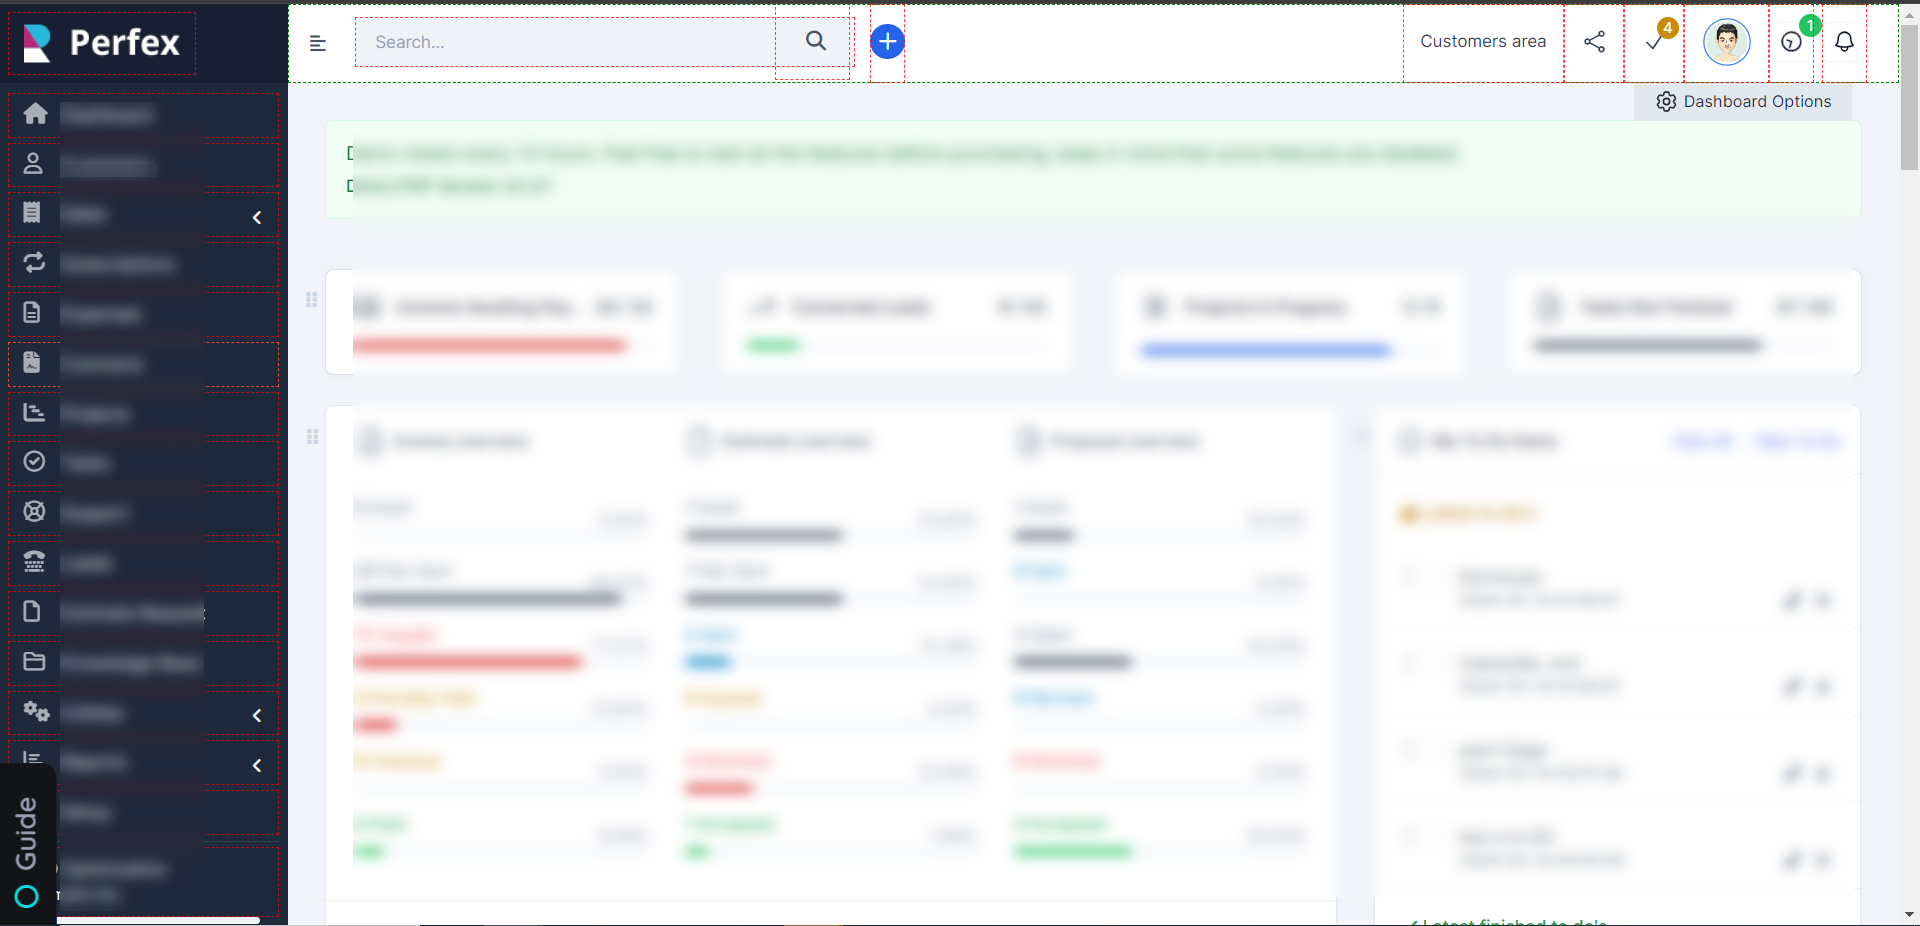
In the following configuration, the "side bar" is tracked, which is mentioned in the configuration for the specific area.
Note: Here, the mentioned configuration that overrides the automatic tracking because the tracking is enabled for areas mentioned.
CASE 2: Trackable element override the Auto Detection
UI configuration for tracking or untracking individual table elements will not affect detection specifically within the context of tables.
Example:
In the provided illustration, Configuration has been applied to a table, and a distinct trackable element has been defined independently. However, the trackable element associated with the designated table will not be presented separately. This outcome arises due to the prioritization of the table's unique characteristics.
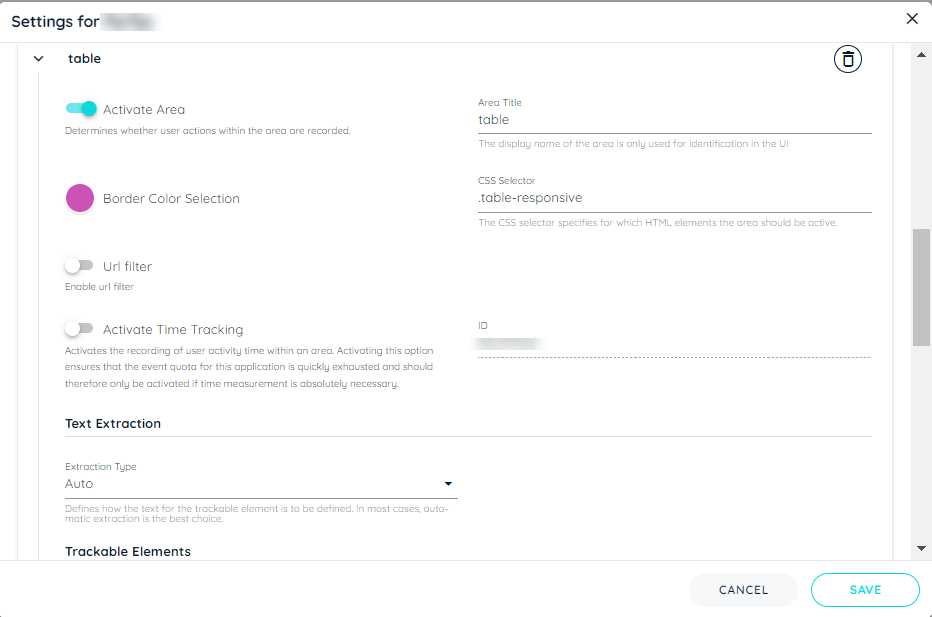
configuration for table area
Configuration of table element
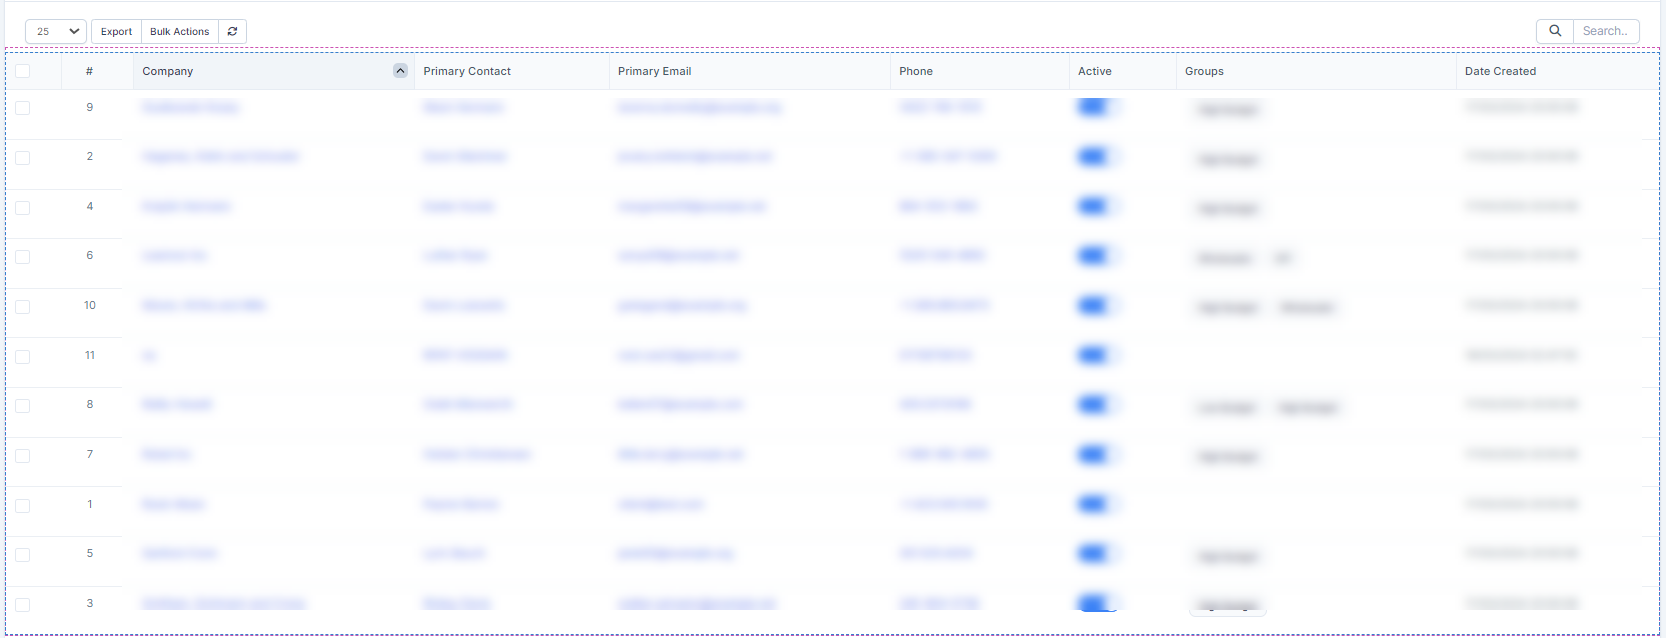
table borders detection
CASE 3: Individual element tracking for forms and navigation
If we configure area to track form and navigation elements individually, the system will follow the set configuration to monitor specified elements within forms and navigation.
Example :
In the given example, we've configured forms and navigation, allowing the disabling of chosen form fields and navigation tabs. Consequently, contrary of a table case, it will utilize configuration for specific form and navigation, deactivating selected trackable elements within those particular forms and navigation instances.
Here we can disable input fields of "form" and Knowledge Base button of "navigation bar".
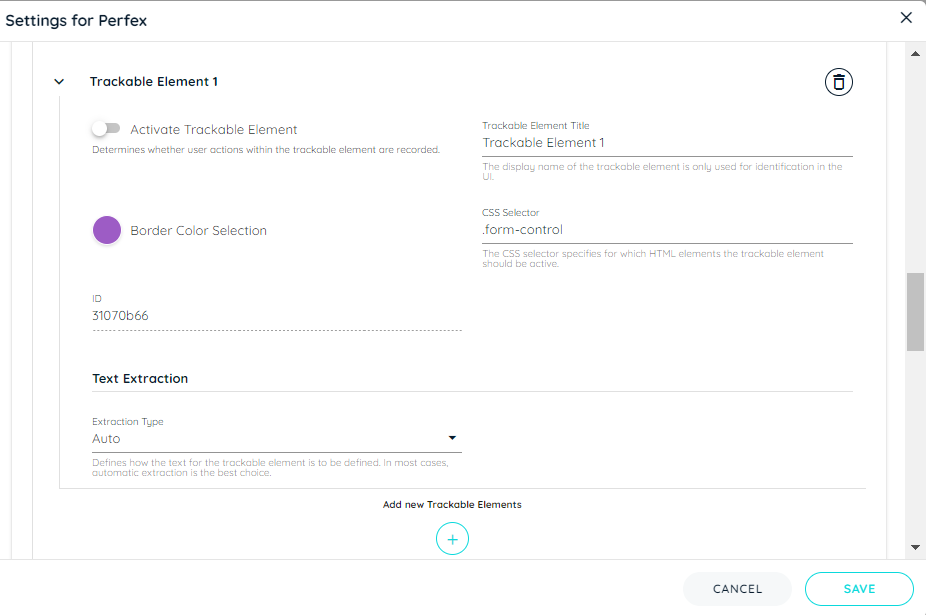
Configuration for form input element
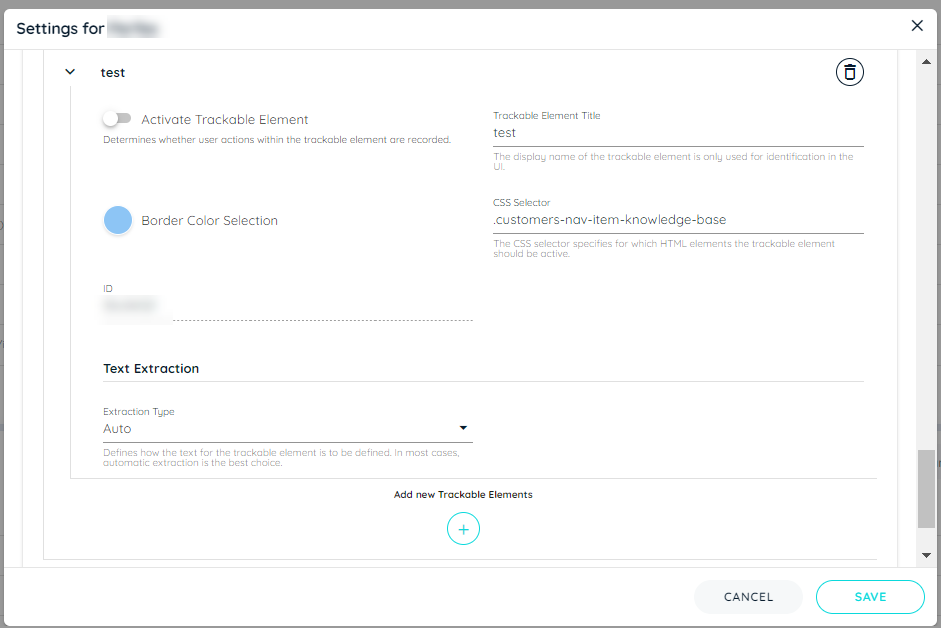
Configuration for top menu element
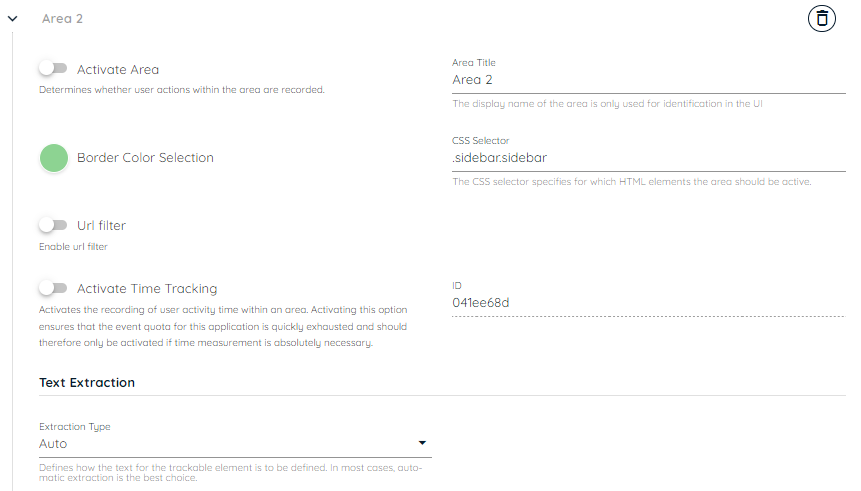
CASE 4: Nested Area tracking
When two nested areas are defined within UBM configuration, only one of these areas will be identified and monitored.
Example :
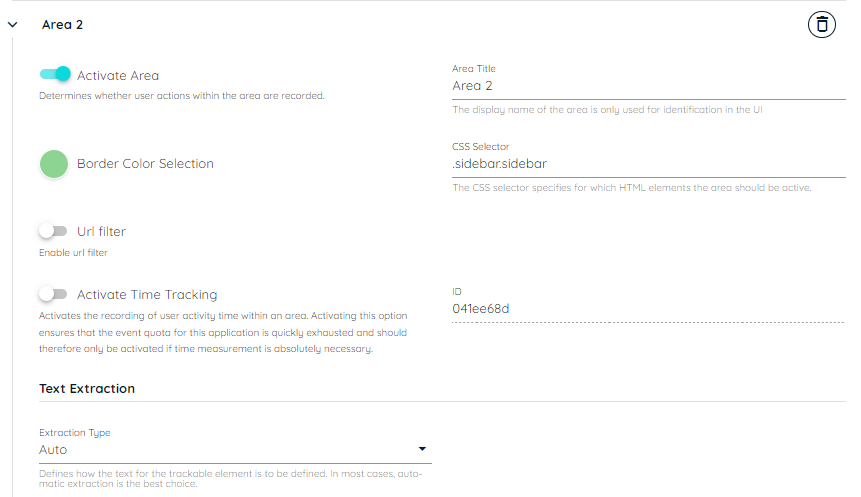
Consider the scenario below: "Area 1" will be identified and tracked, whereas "Area 2" will neither be identified nor subjected to tracking.
Configuration for Area 1
Configuration for Area 2
DISABLING AREA 1 :
If "Area 1" is deactivated, "Area 2" will subsequently be detected and presented.
CASE 5 : Another div that contains a table
When an area contains a table, activating the "Auto Detection" feature facilitates the identification of the table within that designated area. Detection hinges on the presence of a clickable element within the table; lacking this, detection will not occur. However, if the "toggle" function alone is enabled, the table will be detected regardless of clickable elements.
EXAMPLE:
In the following example, the area that contain table will be detected automatically, and only the clickable elements are tracked.
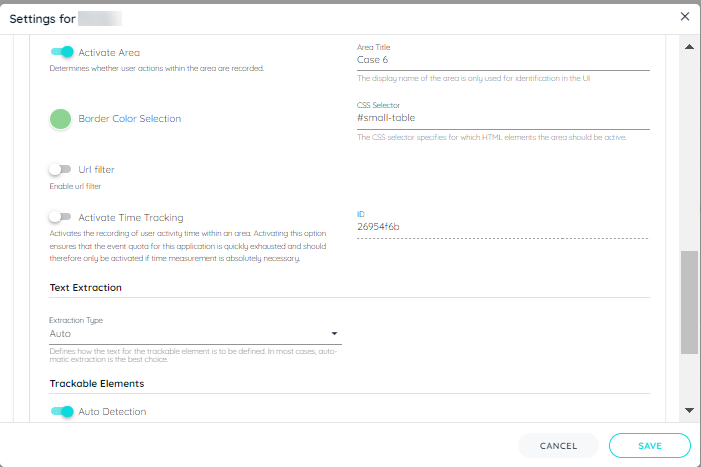
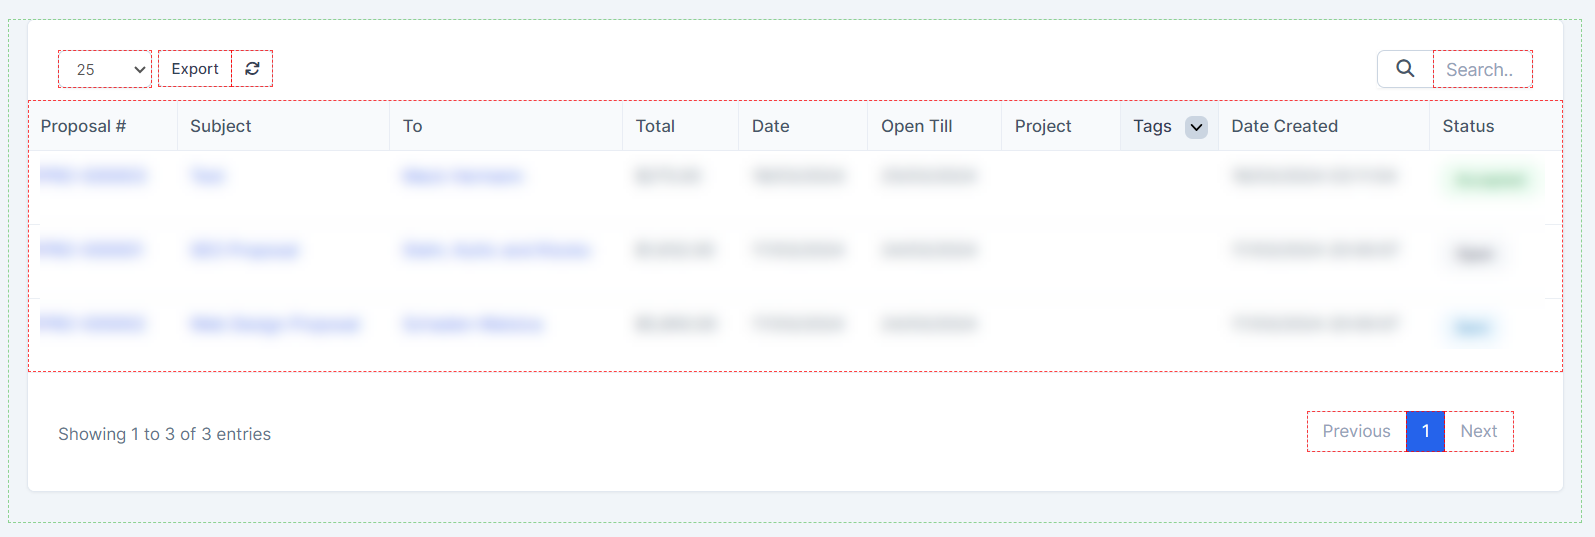
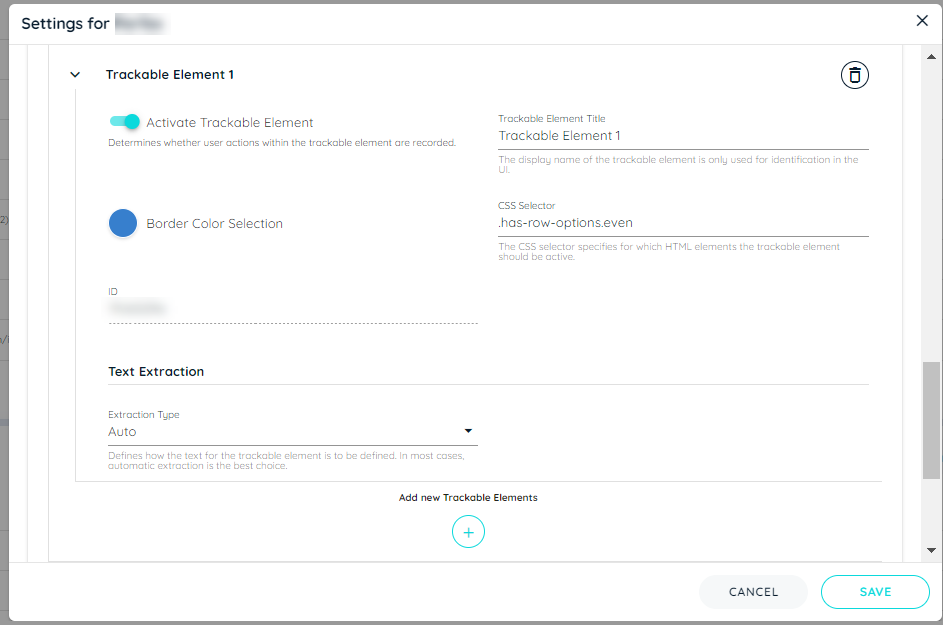
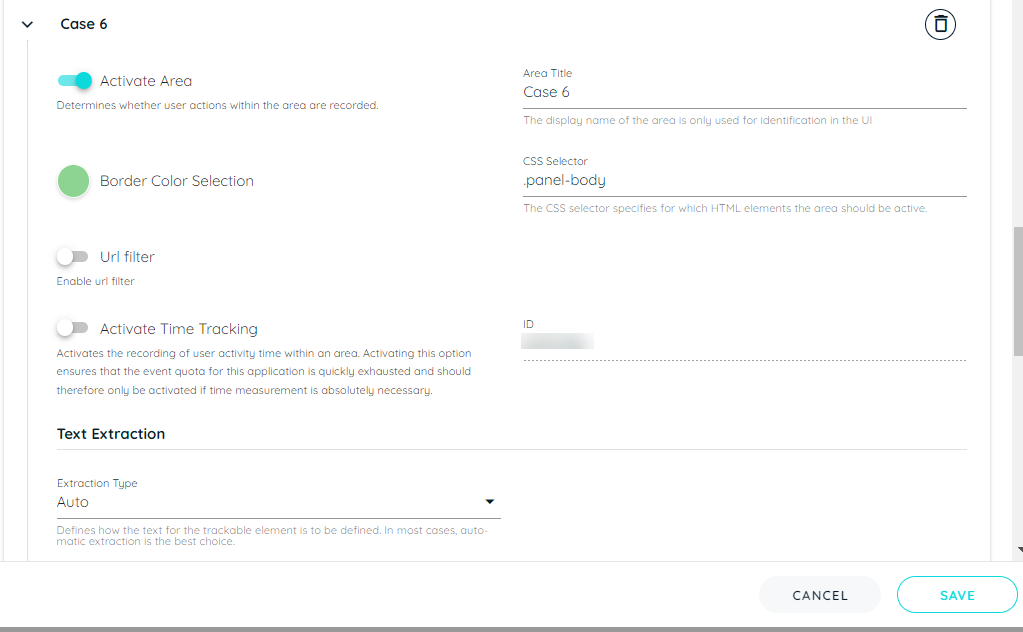
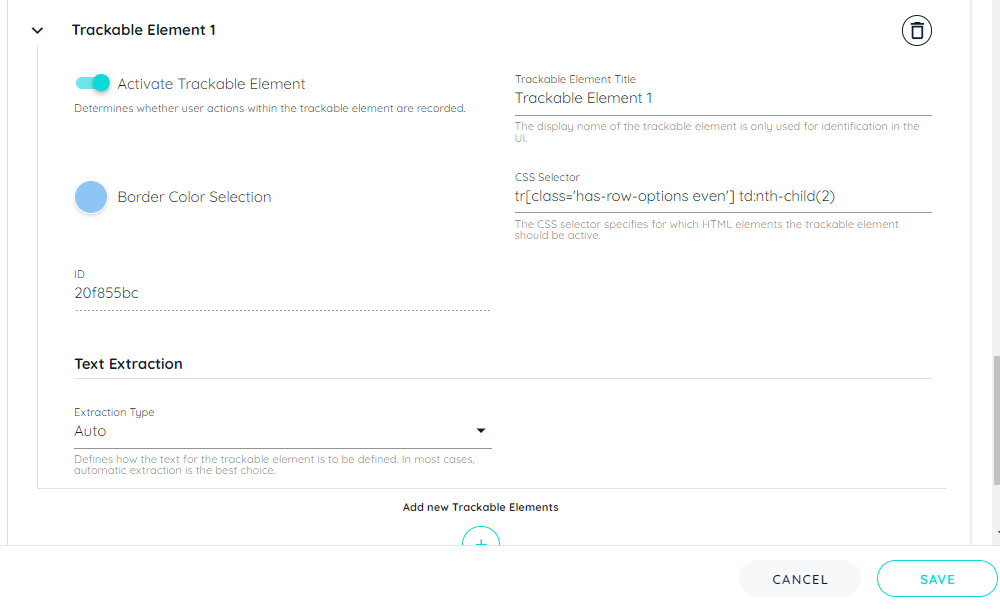
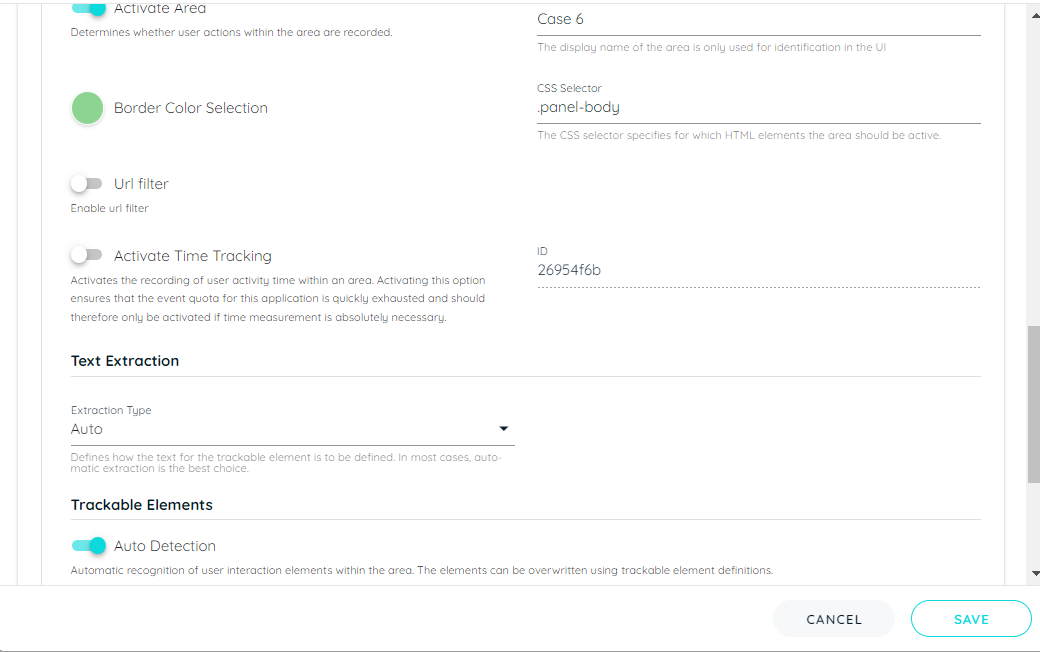
CASE 6: In this case, a table is defined as an area, and the user defines separate trackable elements
When a table is incorporated as an area and the "Auto Detection" is enabled, the system will detect all clickable elements within the table. However, in cases where "auto detect trackable element" is disabled and distinct trackable elements are individually defined, the system will ignore configured trackable element and only track the complete table regardless of clickable elements.
EXAMPLE:
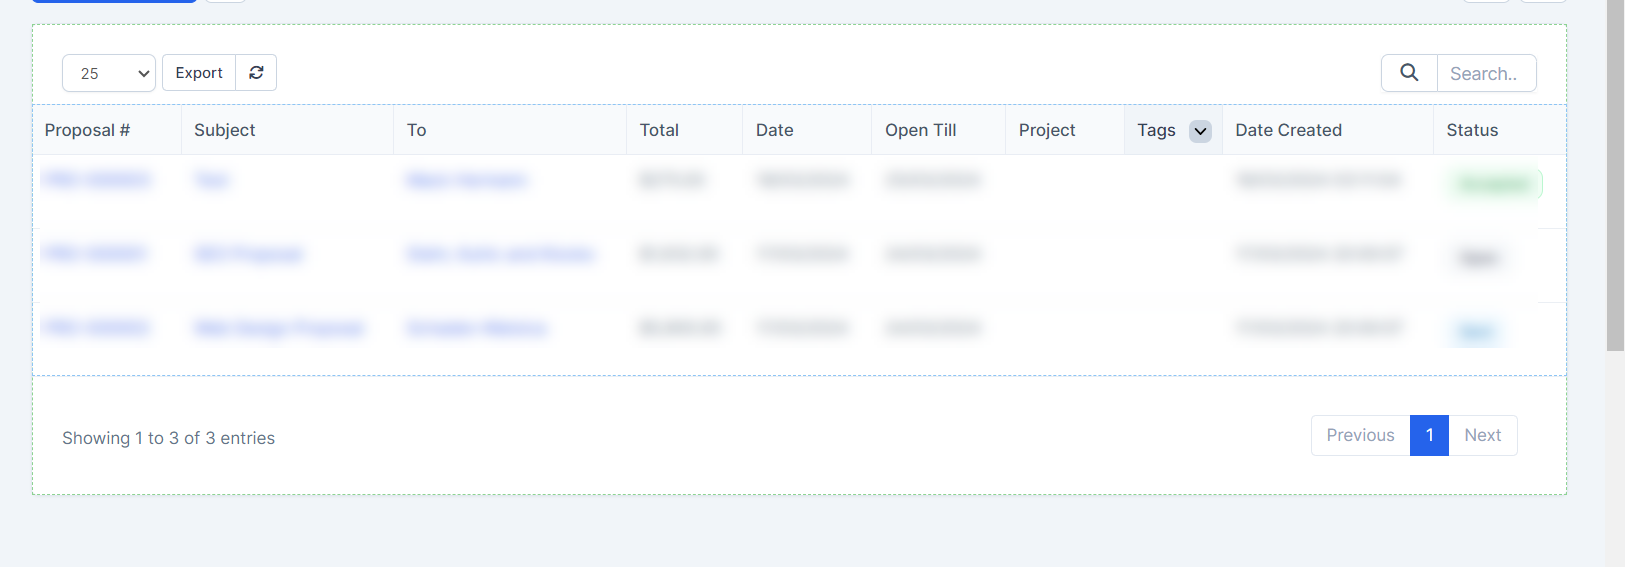
In the following example, the Auto Detection is disabled, and trackable element is defined individually.
So for this, the configuration for trackable elements will be ignored, and the complete table will be tracked even if it doesn't contain clickable elements.
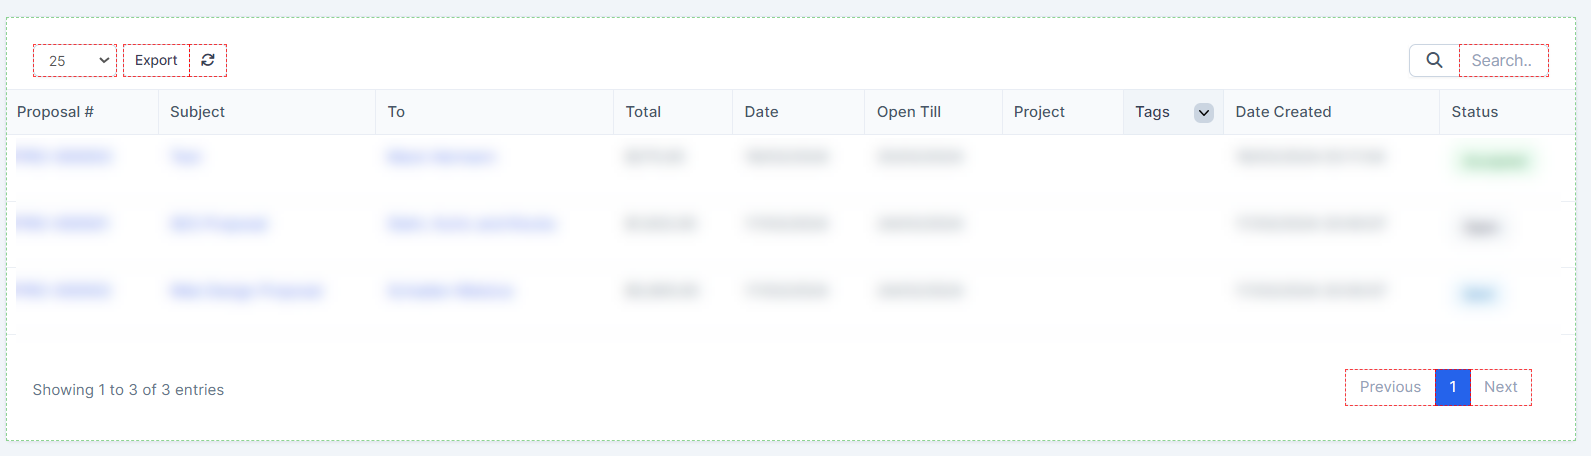
In the second example, the Auto Detection is enabled, and trackable element is not configured individually.
So for this, A complete table area will be detected, but only clickable elements will be tracked.
Updated about 1 month ago